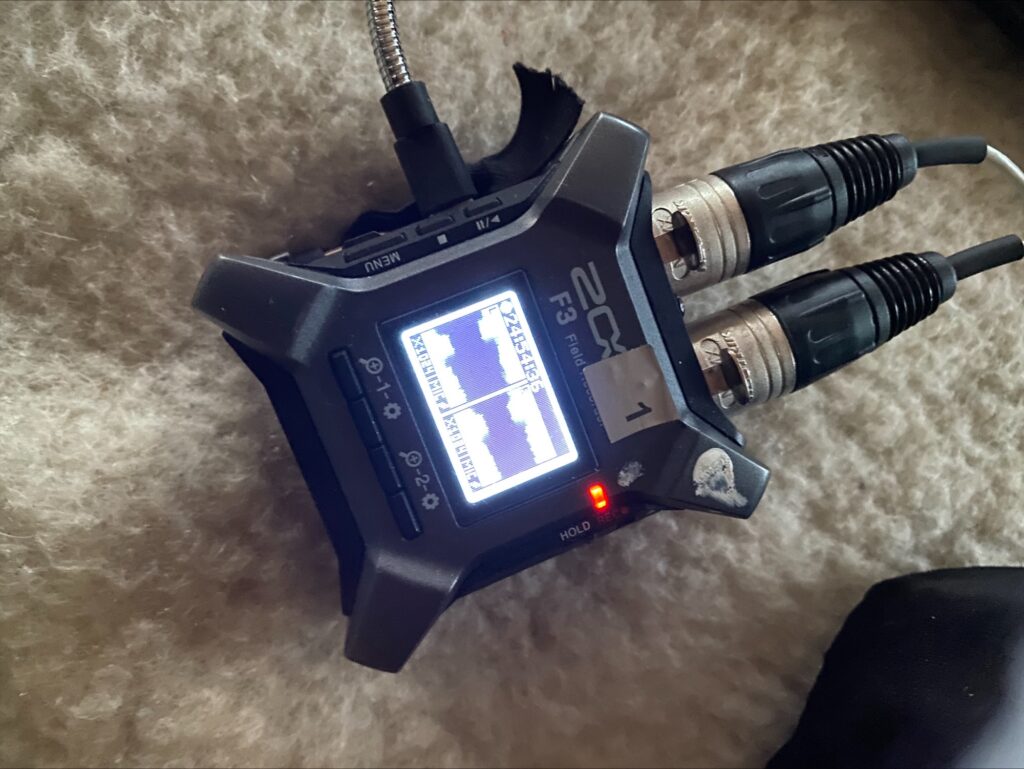
Layout of the recorder
F3 is a small and handy recorder well suited for most recording situations due to light weight and very easy setup, but still a few bells and whistles to tweek so I make this guide for stereo and mono setup.
The recorder itself weighs only 262 grams including 2 AA batteries and it can run for many hours on these. The dimensions are rather cubic with 75x77x46 mm’s and makes it quite easy to bring into field and creates neat drop-rigs that runs for days with a suitable Powerbank 10000 or 20000 mAh.
There are only 2 XLR-inputs but with several options for «3.5 mm to XLR» adapters available is this not a huge problem. The XLRs are fitted with proper locks and won’t fall out during operation. This I have had trouble with Zoom H5 and is very annoying! There is also an USB-C connector for 5V power and data in/out. It runs both on powerbanks with USB-A and USB-C, end even on ordinary phone chargers. I have good experience with several 220V>5V chargers BUT check for interference if you run it on this powersource!
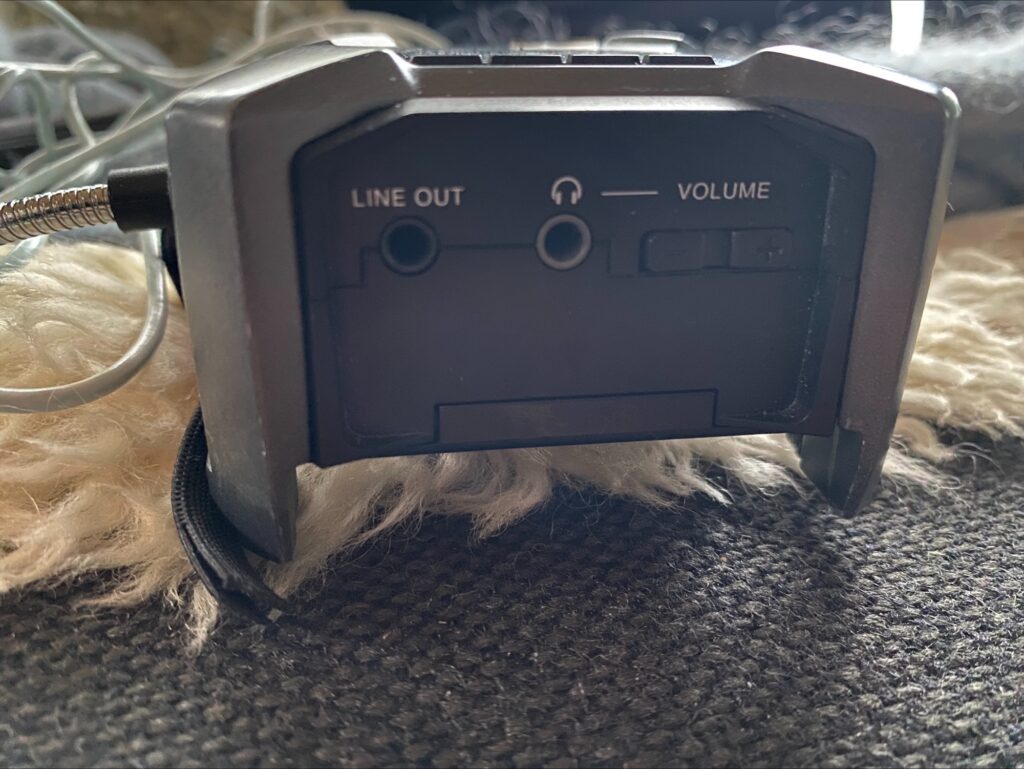
The 3.5mm output for headphone for monitoring works OK for most of us out in the field, more elaborate listening should be done in post at home. There is also a 3.5 mm Line-out for monitoring and video recordings, but I have no experience with this option. Neither have I used the Bluetooth adapter that is available as an addition to the setup.
What do you need to setup before recording?

There is a main MENU knob that runs most of the functions.
Several submenus pops up when pushing MENU and confirms with ENTER:
FINDER: Here you can toggle through the files on the MicroSD-card (and play) using arrows up/down and ENTER.
RECORDING:
REC FILE NAME: use DATE or User defined Name, I use date
SAMPLE RATE: Up to 192kHz, I use 48 or 96kHz
FILE FORMAT:SET STEREO OR MONO recordings
PRE REC: SET # seconds recorded before hitting REC-button
Sound marker
REC COUNTER: SET Elapsed Time or Remaining Time on your SD-card.
OUTPUT: settings for Line out.
USB AUDIO I/F: PC\MAC TABLET
USB FILE TRANSFER: CONNECT TO COMPUTER
SYSTEM:
LANGUAGE: ENGLISH, FRENCH ETC.
DATE AND TIME: SET DATE/TIME AND DATE FORMAT
LCD: SCREEN BACKLIGHTED, I SET IT FOR 1 MINUTE CONTRAST: 3 WORKS FINE FOR ME
POWER: SET YOUR BATTERY TYPE AND AUTO POWER OFF: I’VE SET IT TO «OFF» SINCE IT MUST RUN FOR DAYS..
SD CARD: FORMAT (Format and Execute to format the card) AND TESTING options
Settings for each channel and microphone connected is done by the 4 miniature knobs below the LCD SCREEN. The first two are settings for input 1-one and 3 &4 are for setting XLR-input 2-two.
Left knob is a setting for the input level and for practical reasons I set these same level x1024 or x512. All these are possible to change in post since the recorder is performing 32bit float-files and can easily be normalised to wanted level.
Number 2 and 4 has more settings:
Input 1/2:
ON/OFF turns on or off the mic input, for example with mono setup. Keep it on for stereo!
SOURCE: Define what mic you are using, I set Mic (+48V) phantom power.
Phantom voltage: 48 or 24V
HPF: SET HIGH PASS FILTER up to 240 Hz in
Invert Phase
Delay
Practical operation in field
When you have done all the settings it is really easy to start your main task, recording great natural sound in 32-bit float file format! Push the REC-button to the very end and RED LIGHT appears when recording, there is even a HOLD function to make shure it is not turned off when in a bag or other medium! I use it when I leave the recorder out for overnight recordings, just doublecheck that it is recording before you pack it into the bag!! Most POWERBANKS needs to be set to ON (Push ON-button) to deliver power to USB-C input. Do it to ensure safe delivery of power, (NB!!) some Powerbanks has some funny electronics that turns off the power when it thinks it has charged the batteries (check this before you go to a far-away destination!) – you need it to run till it bleeds out! And remember 2x AA as well!
I wish you good luck with your F3!!
USEFUL LINKS FOR FURTHER ASSISTANCE:
ZOOM F3 manual
Mindful Audio Review George Vlad
You tube F3
Quick setup guide – Curtis Judd
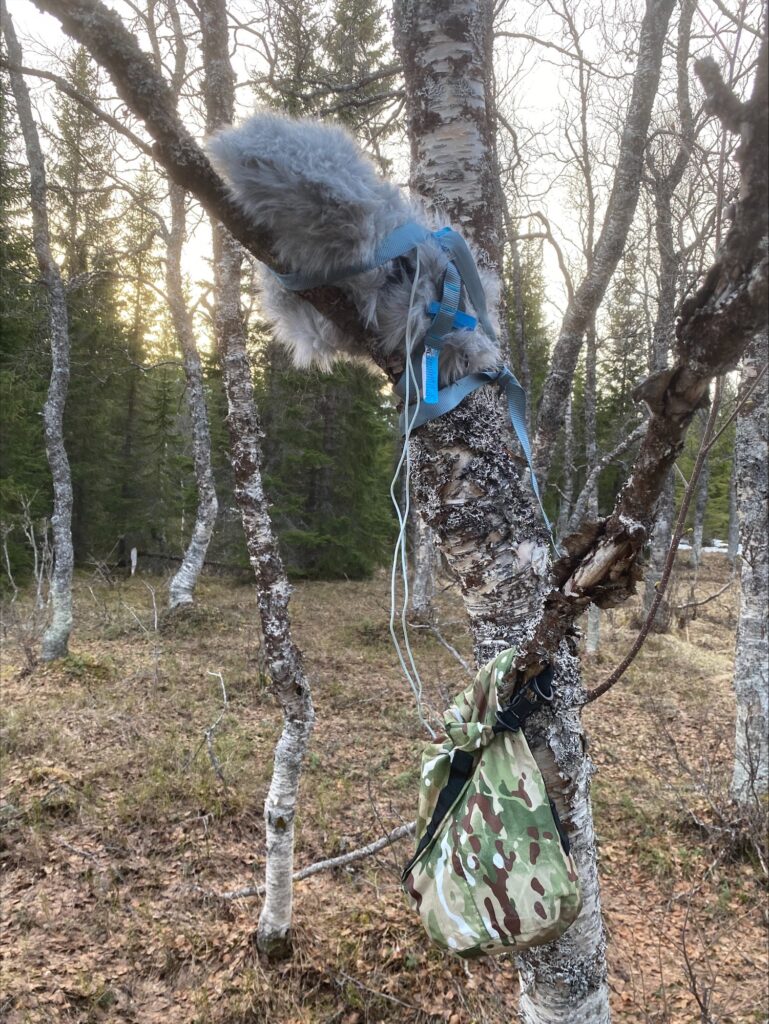
DROP-rig with F3 and SASS mics attaced to a tree ready for 2 days recording at 69N in Tromsø, Norway
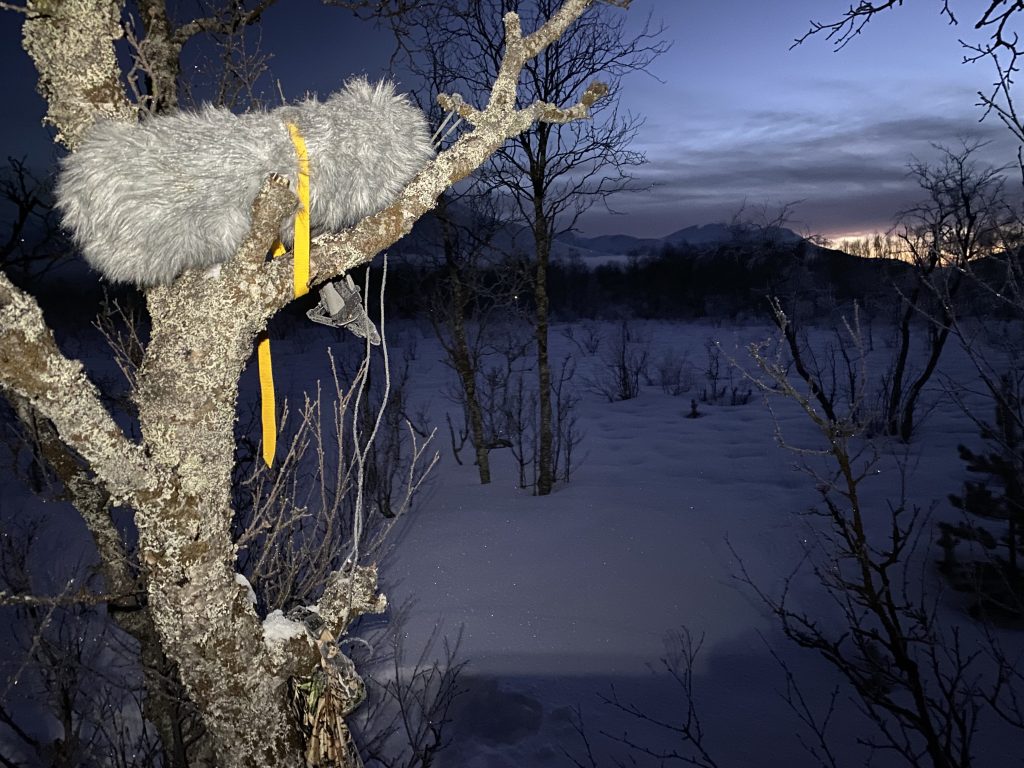
Result from one night near a owls nestbox, F3 and EM272’s in Røde Blimp (Photo below, -15C and still running after 15 hours!). Compiled recording through the night: Northern Hawk-owl
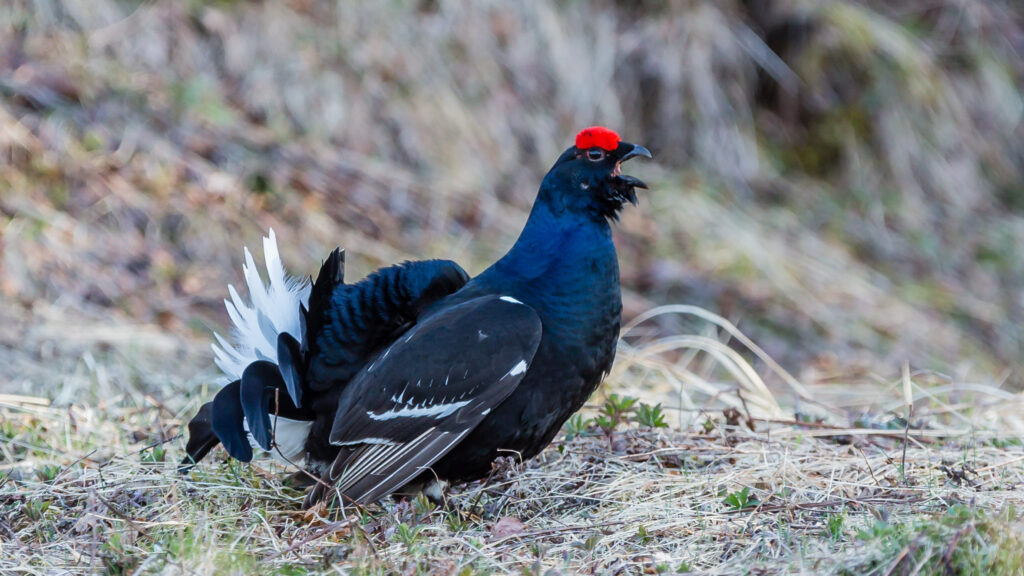
Black grouse displaying at lek in Northern Norway 69N. The birds are walking, jumping and calling just below the mics ab. 1.5 meter up in a tree-trunk.