FOR BIRDSONG, CALLS AND SOUNDSCAPES
Updated: August 2025
About Audacity
Audacity is a free editing software you safely can download and use. You can cut files, remove low-pitch rumble, remove bands of sounds like crickets or funny machinery with equalizer and you lower or risen volume before uploading as mp3 or wav for further use+++. A package of loads of fun playing around with files up to 24 or even 32 bit float. See https://www.audacityteam.org/download/ for more information, NB we do not take any responsibility for software you download!
Filtering
Editing birdsongs and calls in the free software Audacity is quite simple when you get to know the basics of the layout. Personally I prefer to work in Spectogram view so I can see the noise, pings, handling noise, stomach rumbling and other unwanted parts of the recording. Push the small triangle/three dots up left and change between waveform and spectogram. Use the preference tab in menu to set permanent choices. Through this simple guide I hope you will be more familiar with this powerful tool and in the end publish more (and less noisy) birdsounds from around the world at xeno-canto.org or Macauley Library ++
I use a PC for this guide, but it works more or less the same way on a Mac!
For further insight in setup of Audacity; read the article by Audacity team
First you need to open a recording via File> Open
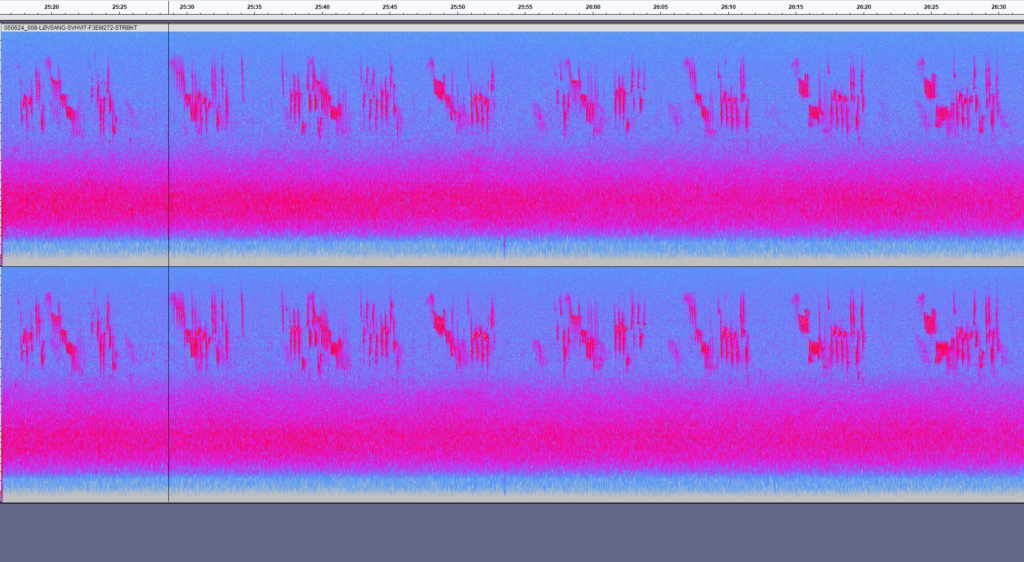
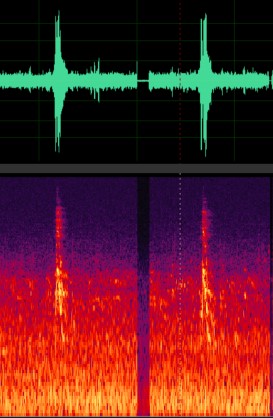
My testfile is a 32-bit float Willow warbler and Pied flycatcher from Northern Norway singing, the frequency range of the song starts at about 2 Khz and all the shady area below are noise from sea, wind and rivers nearby.
Open your file and then you will get a screen looking something like this.
NB My Audacity is a Norwegian version!
On the Y-axis (left vertical) is the frequency range from 0 Hz to ab 9000 Hz (9 Khz)(NB Ctrl-P to change this setting), To change/zoom the frequency-range push RIGHT button on the axis above 0k, Choose Zoom in/Zom out.
TOP scale is time in seconds, first 36 seconds of recording shown. NB! In Edit>Preferences you can preset the scale you want to start with when opening Audacity. I have set: Max 9000 Hz, Min 0 hz Window type: Hamming, Window size 4096.
The horizontal X-axis is in seconds and minutes, this total recording is ab 1:15 minutes long, I will work with a part of this. To select a part of the recording set your pointer (arrow) on a place along the X-axis and push left mouse-button. Then hold and drag the mouse to the right or left to define the area you like to edit. Ctrl +A for editing the whole file!
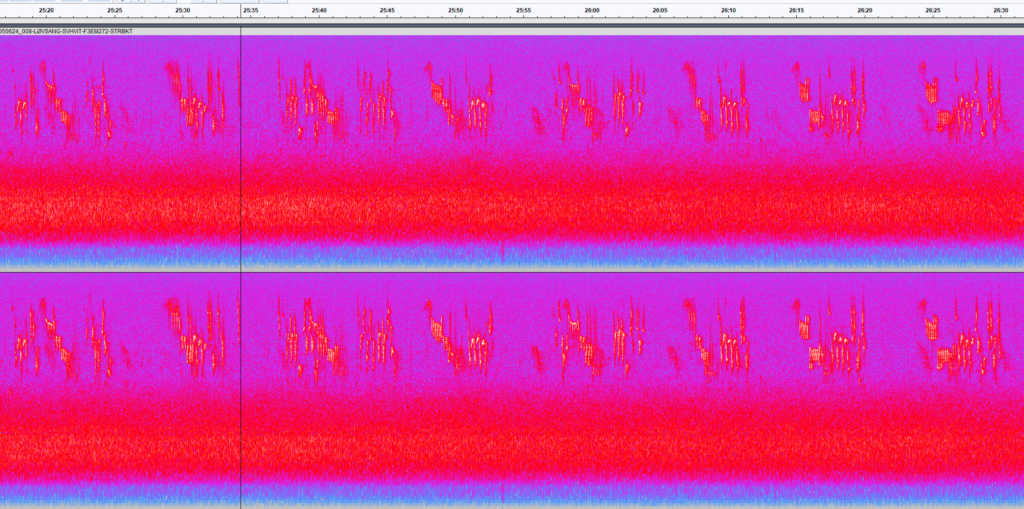
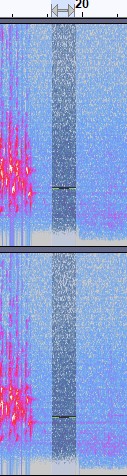
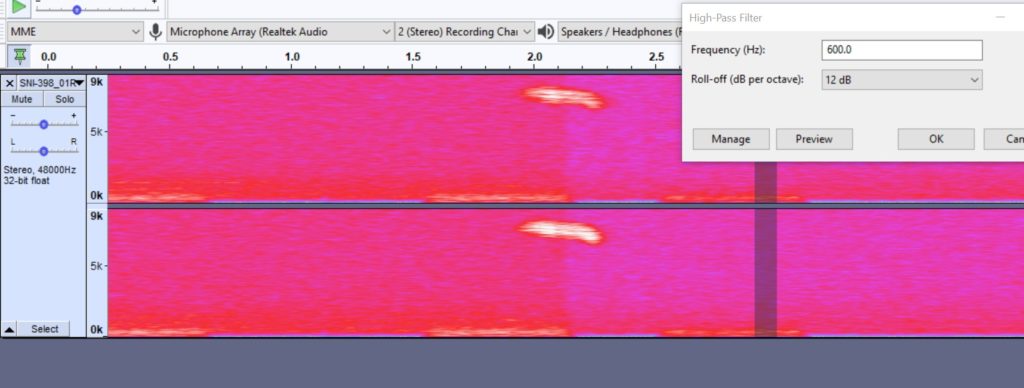
Next step is to define how much of the bottom noise to filter, following the the left axis we can see the song starting at ab. 2 Khz so some of the noise below can be edited without affecting the song itself. I first choose to use Effect>High Pass Filter, set it to 400Hz and level 12 db. (100 – 250 Hz and 6 db will give you a more natural feel to it!)(In Audacity 3.7.5 it is named «Dominic Massoni>High Pass Filter») This will give you a soft start close up to maximum level without destroying the song itself. Blue area in bottom indicates the area filtered.


In this case it’s already quite smooth all the way to the bottom line (0-100 Hz) but often traffic, boats, engines, fans etc in the neigbourhood creates a hum that is annoying, and we can choose to filter that even further. I choose High Pass Filter, set 6 db and 1000 Hz. Now you will see it turns white (blank) and there is NO sound at all in the bottom part! To strengthen the effect: Ctrl + R NB! This could create a less natural result, so test it out before publishing!
Last action is to normalize the recording, this works very fine with 32-bit float files. NB! White noise is also increased but this could be reduced with High-pass filter or EQ Equalizer without destroying the birdsong. NOTE: If there are singular high pitch noise like a short ping etc it should be removed before Normalize – since this command always looking for the loudest sound to lower til 0dB!
NB! Normally 150-400 Hz and 6-12 db is sufficient for a nice result! This could reduce background a little but does not take away the surrounding environment completely! Be aware of birds like Black grouse/Doves and other low frequency birds not to filter away the song itself!
Listen to some of our soundscapes
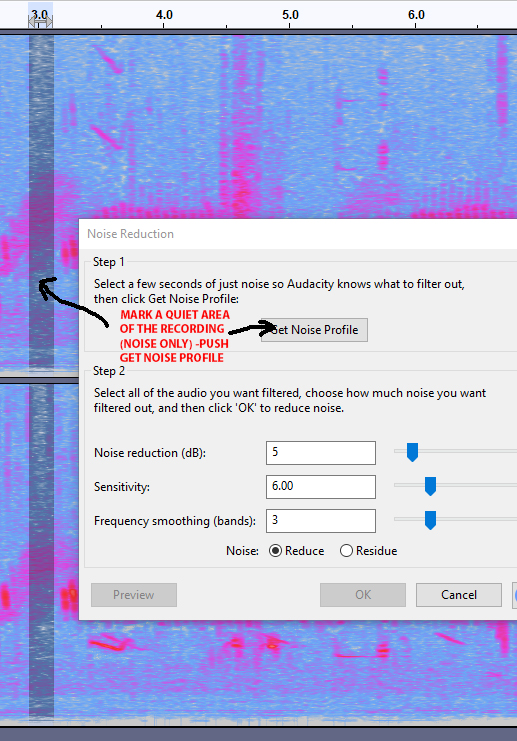
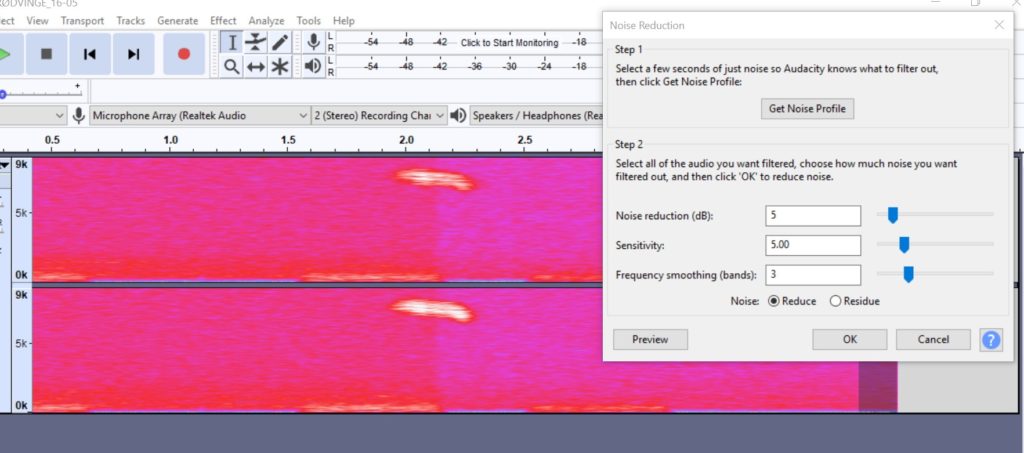
Noise reduction filter: This is normally enough and you can save the file, but sometimes White noise (wind, traffic or running water etc.) makes the birdsong less attractive, in Audacity there is a filter «Noise reduction» that can reduce this noise. If used wrong and too harsh it can destroy the quality of the song itself so be careful. I seldom set level higher than 4 or 5! First step is to drag an area with ONLY noise appearing, you do not want to filter the song itself. Then choose Filter/Effect > Noise reduction and set the level to 5 in step 1 «Get Noise Profile» , push OK. Then mark the targeted area again (CTRL + A will mark the whole recording) and push Ctrl + R and it will do the job!
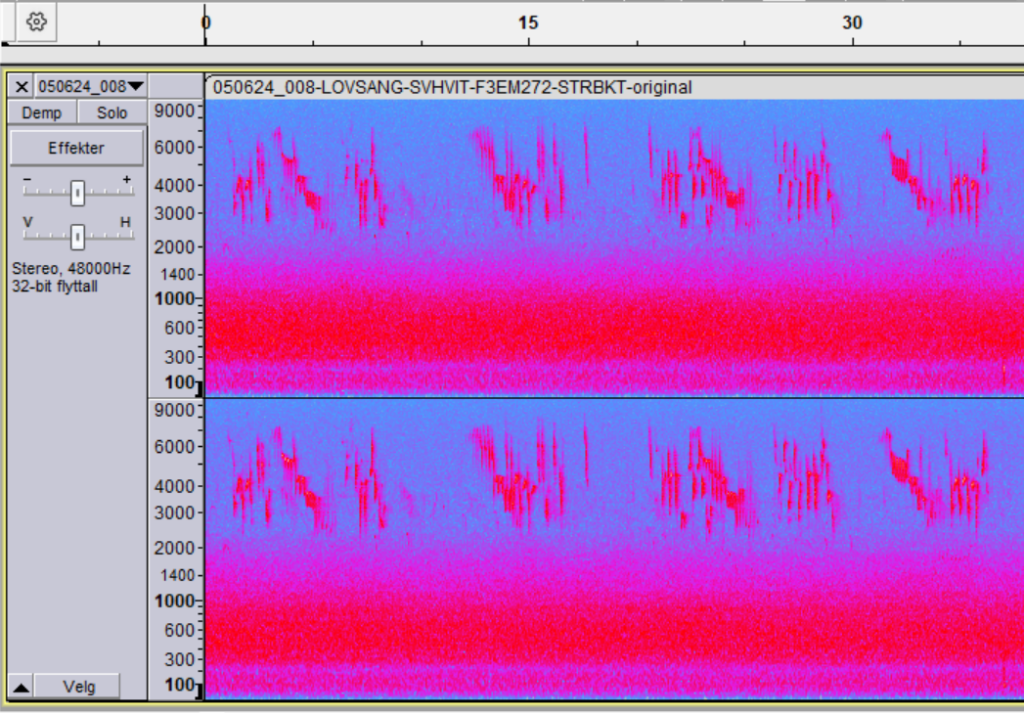
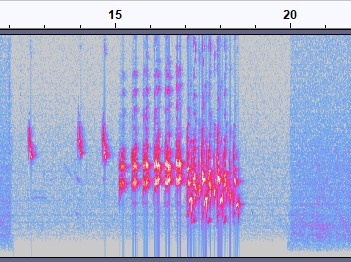
Below you will see the the final result and the uppermost noise is a bit lighter and less prominent, this without destroying the original song made by the bird! (Effects used: Highpass filter 1000Hz 12 db, Normalized -0.1db , Noisereduction 5db)
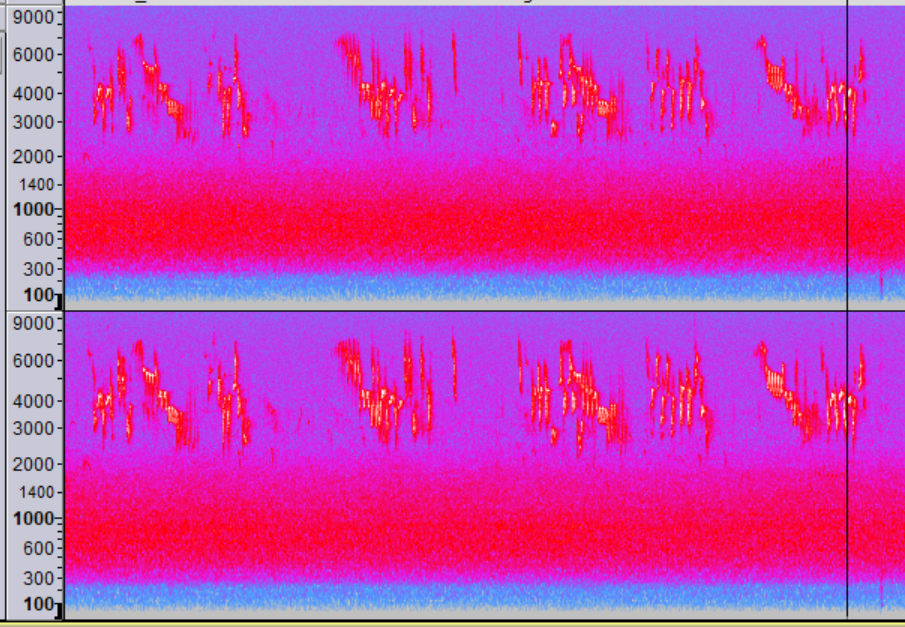
NB! The Xeno-canto team do not recommend this filtering, but for listening to a noise-free recording it really helps! Use this with caution!!
You now have to export the final result to your hard-disc or other media. Again mark/select the edited area and choose:
File > Export> Export Selected Audio The box will ask you where to put the file and the format (MP3 or wave (WAV)). Push Save and you will get a new box –
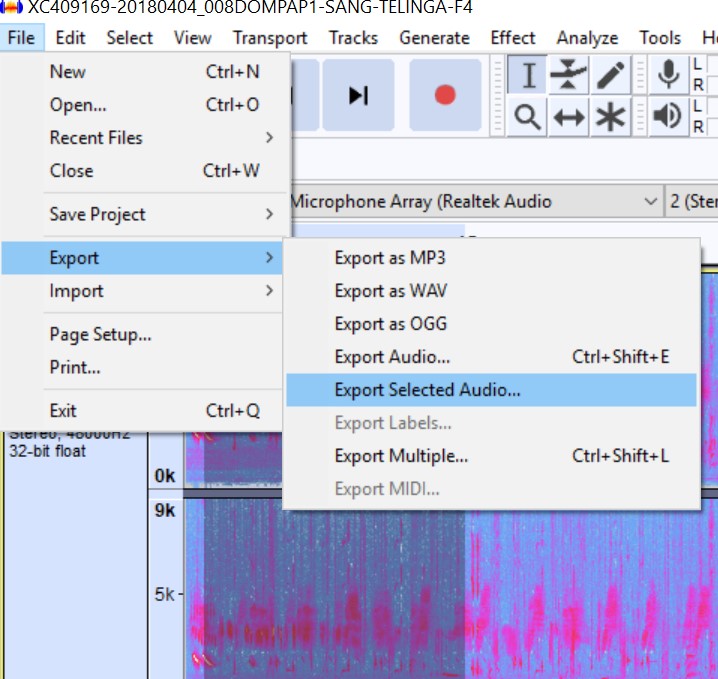
NB! If you choose «Export as MP3 or..WAV» it saves the whole file! Xeno-canto recommends Wav 16bit since that creates a smaller file easier to handle on web. There is a maximum file size at XC of 100Mb!
The Metadata.
Here you name the recording f.ex. Willow warbler male singing, Troms County, Label a Album; Birds of Norway, Year, Additional info; Weather, recorder used, Mics etc. Then push Save and the new file will appear in your chosen folder. NB The latest version of Audacity (Version 2.3.2 or later) comes with already installed MP3-converter (LAME).
THE MAGIC OF 32-BIT FLOAT FILES!
In 2019 the first recorder came with ability to record in 32-bit float and edit it in Audacity and several other software packages. We show here an example from Adobe Audition of a Wigeon male completely messed up and you can pull it down with no loss of quality, see and hear the examples how it works.


We wish you good luck with your editing and remember to share with other soundgirls and guys around the world! XENO-CANTO is a perfect home for your recordings.